How to Enable Call Recording
Call recording functionality within Vumber allows you to effortlessly capture and store important conversations for specific numbers, enhancing your ability to maintain accurate records and extract valuable insights.
When enabling call recording for the first time, users may encounter a prompt to review and accept certain terms and conditions. It's crucial to carefully assess these terms as there are legal implications associated with toggling off the "Call Recording Warning".
To activate call recording through the Vumber app, follow these straightforward steps:
- Open the Vumber app on your mobile device.
- Tap the "Hamburger menu" icon located in the top left corner.
- Select "My Numbers" from the menu options.

- Choose the number for which you want to enable call recording by selecting "Configure" next to it.

- Once in the number settings, find and tap on the "Call Recording" option.

- Tap the box beside "Enable" to activate call recording for this number.
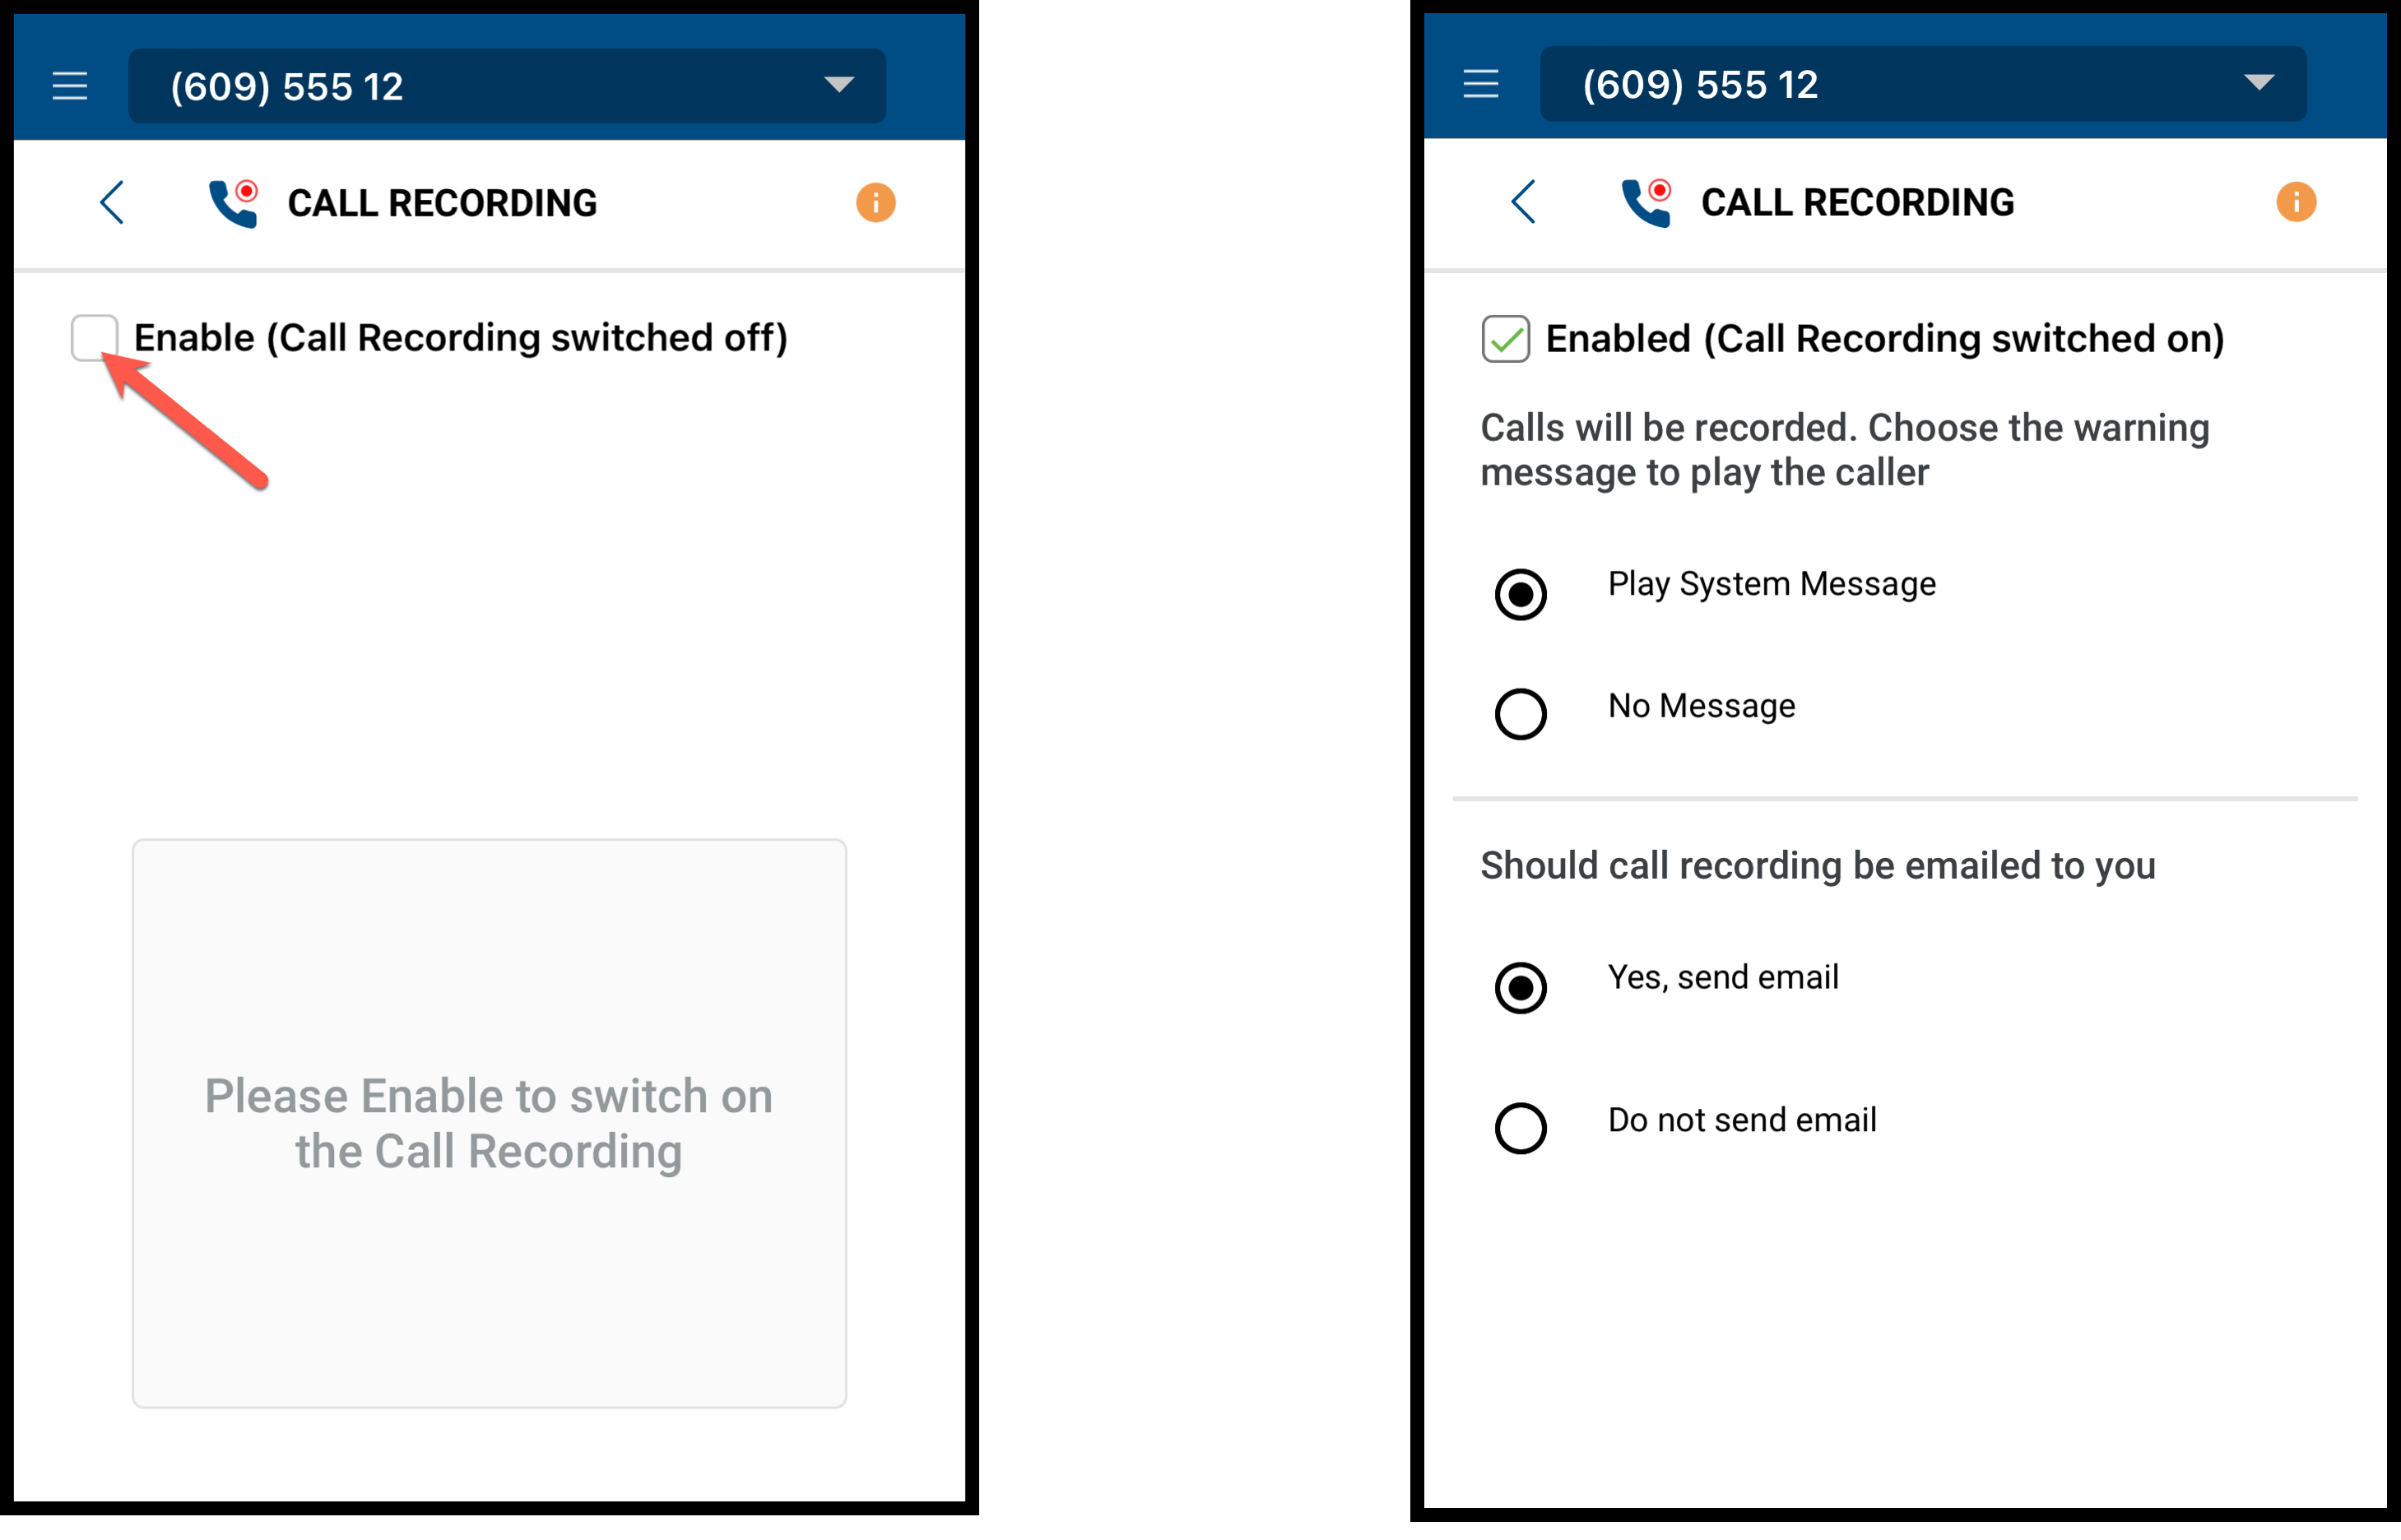
- Once enabled, all incoming and outgoing calls for this number will be automatically recorded.
To activate call recording via the dashboard, follow these simple steps:
- Log in to your account at https://app.vumber.com

- Click "My Numbers" from the menu on the left.

- Click on the number for which you wish to enable call recording. Alternatively, click the "Configure" button located to the right of the desired number.

- Within the number settings, locate and click on the "Call Recording" tab.
- You'll see a button labeled "Click here to switch on call recording." Click on it to enable call recording for this number.

- Once activated, all incoming and outgoing calls will now be automatically recorded.

If you encounter any issues or need further assistance, feel free to reach out to our support team.
The Vumber Team